My Mascara Routine
Friday, August 09, 2013
Hey Ladies!
Are your lashes short and thin like mine? :(
Well, you have to turn that frown upside down :D 'Cause today I'm gonna show you some tips and tricks on making your lashes look longer and thicker!
This is so far the best mascara I bought my entire life. It's The Falsies Black Drama by Maybelline. I've been using this for a year now. This is a drugstore brand so don't worry about the price. I got mine at Esselunga for 12 euros.
- First thing I liked about this product is it's Contact lens safe and Ophthalmologist tested. (I wear contact lenses everyday 'cause of my bad eyesight) so, this is a plus for us blind ladies!
- Second is, the formula has long fibers to create long and thick looking lashes.
- Third, it has patented spoon brush and flexible stem which makes it easier to apply!
Moving on...

Before mascara I already curled my lashes and I wasn't wearing eyeliner. Excuse my brows and oiliness :\
After one coat you can instantly see the difference. My lashes looked more defined.
after the first coat, I wait 15 seconds for the formula to dry then I curl my lashes again. I know some of you are scared to curl your lashes after putting on mascara, 'cause your lashes might fall out, but you don't need to do this step, this is just how I do my lashes. I don't wanna be responsible for your lashes falling out hahaha! but re-curling your lashes does make a big difference.
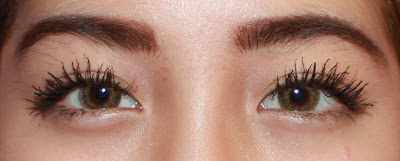
Second coat Lashes looked longer and thicker. (I go to school with 2 coats)
Third coat As you can see, Lashes are starting to look clumpy. I personally like clumpy and spidery lashes. I usually go out with 3 coats, depending on where I'm going.
Before and After
That is it! That's how I do my clumpy lashes! I hope you enjoyed and learned something from My Mascara Routine! ;)
THANK YOU FOR VIEWING LOVIES!xx <3


0 comments